Weekend adventures under $100 that build real confidence. Start where you are.
You don’t need a passport to be an adventurer.
You don’t need thousands of dollars saved or two weeks of vacation time stacked up.
You need Saturday morning. A full tank of gas. And the courage to say yes to something new.
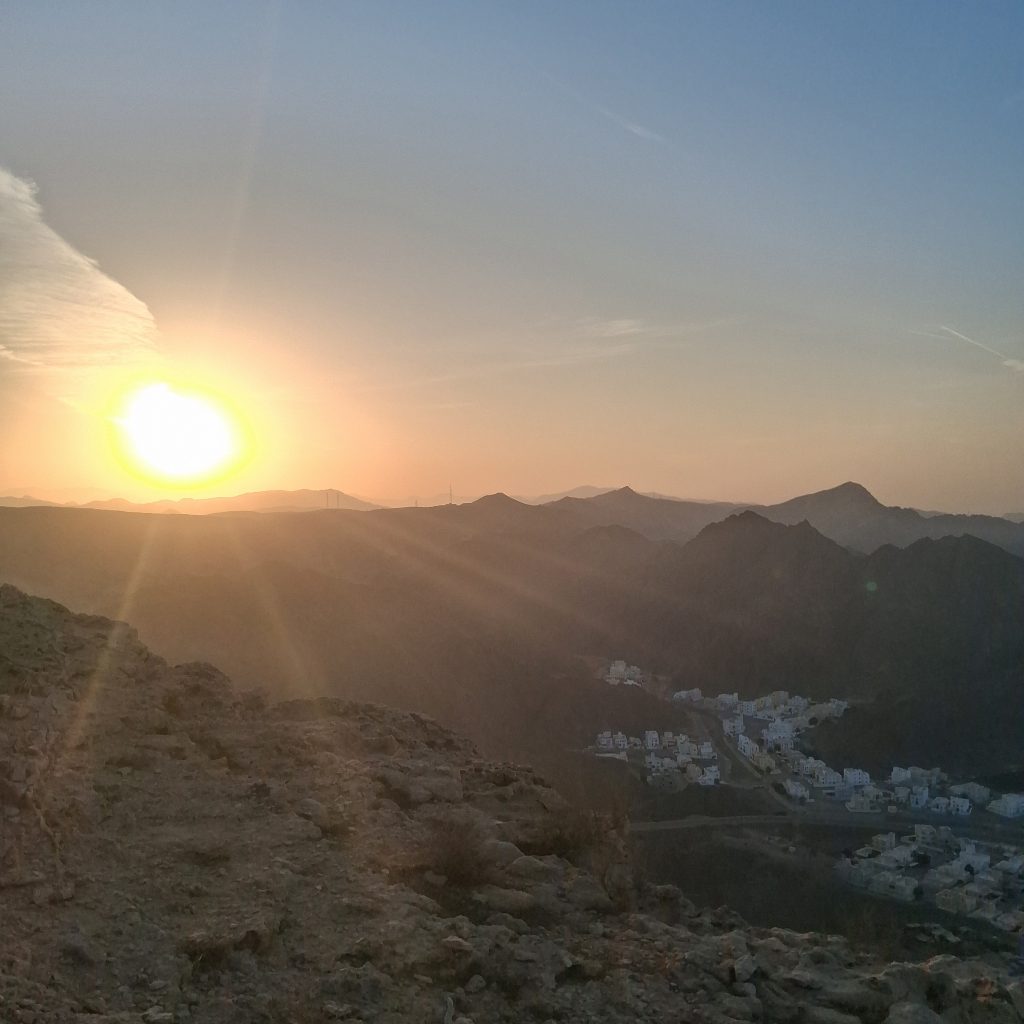
I’ve climbed Mount Kilimanjaro. I’ve sat at the edge of Oman’s Grand Canyon. I’ve hiked the cliffs of Cinque Terre and watched the sun set over the Arabian Sea.
But here’s what I don’t talk about enough: every single one of those international adventures started with something smaller. A sunrise hike at a local trail. A solo drive to a town I’d never visited. A morning alone at a coffee shop, learning to be comfortable in my own company.
Adventure isn’t a switch you flip when you land in a foreign country. It’s a muscle you build; one small footstep at a time.
For months, maybe even years, you’ve been thinking about solo travel. You follow accounts like mine. You save posts. You dream about it. But something always holds you back.
“I don’t have enough money.” “I don’t have enough time.” “I’m not brave enough yet.”
Here’s the truth: you don’t need to start with Kilimanjaro. You don’t need to book a flight to Europe. You need to start where you are, with what you have, this weekend.
Before I ever left the country solo, I took day trips alone. I hiked local trails. I sat at beaches by myself. I learned to navigate without anyone else’s input. I built confidence.
And you know what? I still do these adventures. Even after climbing mountains and exploring deserts, I still take solo sunrise hikes. I still drive to small towns I’ve never visited. Because adventure isn’t just about the destination; it’s about showing up for yourself.
So before you book that international flight, start here. Start this weekend. Start in your own backyard.
Here are 10 solo adventures you can do this weekend—no passport, no expensive flights, no elaborate planning. Just you, your courage, and a Saturday morning.
Pick one. Do it. Watch what happens.
ADVENTURE #1: Solo Sunrise Hike
What to do: Find a local trail or state park. Set your alarm for before dawn. Watch the sun rise while you hike.
Why it matters: This adventure builds confidence being alone in nature. It connects you with nature’s rhythm in a way that midday hikes never do. And it proves to yourself that you can do hard things; even something as simple (and difficult) as not hitting snooze.
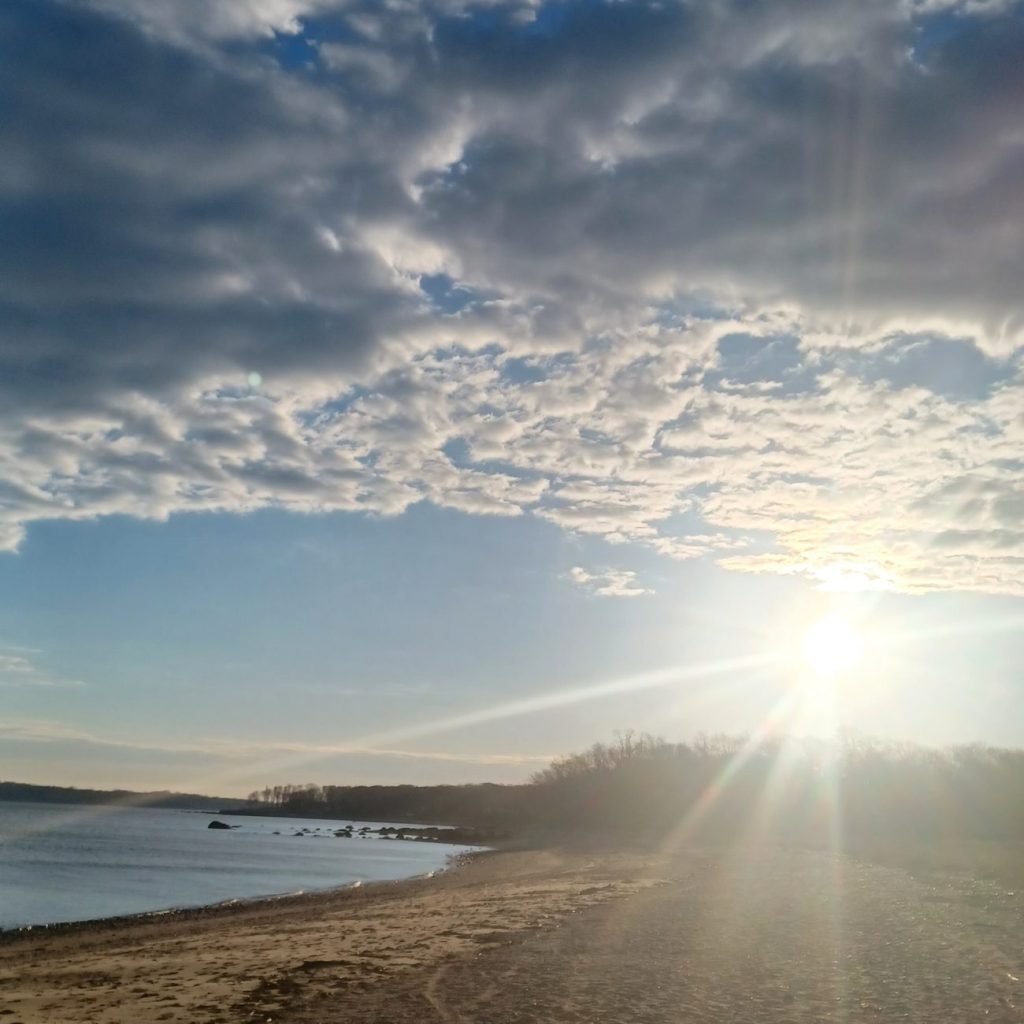
My Story: Caumsett State Park
It’s 5:55 AM. The world is silent. I’m not snoozing my alarm this time.
I don’t know what lies ahead, but I know I’m going to lace my hiking shoes and meet up with three other amazing women to explore nature’s trail.
I’ve been hiking consistently for months, but I’ve never tried a 7 AM hike in winter. This isn’t just any early morning hike, it’s a breathtaking sunrise adventure at Caumsett State Park on Long Island.
As the sun rises, my appreciation for nature’s beauty rises with it. As the waves hit the shores, I immediately know I’ve found a place I’ll appreciate forever.
Through gravel, beach sand, rocks, and grass, we hike for about 7.7 miles. At every turn, the sky changes. The sun peeks through. Deer run across the trail. The warmth of the sun hits my face. The relaxing sound of waves crashes against the rocks. Beautiful sun rays dance on the water.
Hiking at sunrise became one of my favorite adventures that morning.
What You’ll Experience
When you wake up before the world does and step onto a trail, something shifts. You’re not just hiking, you are witnessing the earth wake up. The light changes every few minutes. The temperature shifts from cold to warm as the sun climbs. The sounds are different -birds you never hear during the day, the quiet rustle of wind, your own footsteps.
And you’re doing it alone (or with a small group). No negotiating pace. No compromising on which trail to take. Just you and nature.
How to Find Your Sunrise Hike
- AllTrails app – Filter by location and distance, read reviews
- State park websites – Most have trail maps and sunrise times
- Local hiking groups – Facebook or Meetup groups often organize sunrise hikes
- Google “[your city] sunrise hike” – See what comes up!
Pro Tips
The night before:
- Check sunrise time and add 30-45 minutes for hiking to a good viewpoint
- Lay out your clothes, pack your backpack
- Set 2 alarms (seriously, you will want to snooze 🙂 )
What to bring:
- Warm layers; even summer mornings are cold!
- Headlamp or flashlight (you will start in the dark)
- Something warm to drink
- Camera or phone for photos
- Trail snacks
Safety first (this is exceptionally important):
- Tell someone where you are going and when you will be back
- Download the trail map offline
- Start with an easy, well-marked trail
- Bring a fully charged phone
The Challenge
Can you get yourself out of bed before dawn and show up for yourself?
That’s the real adventure. The sunrise is just the reward.
The trail doesn’t care where it is; it just wants you to show up.
ADVENTURE #2: Day Trip to a Nearby Town
What to do: Pick a town 1-2 hours away that you’ve never visited. Drive there. Explore like you’re a tourist. Stop. Watch. Be Confident.
Why it matters: This adventure tests your navigation skills in a low-stakes way. It gives you practice being a stranger somewhere new. You discover hidden gems that have been close to home all along. And it builds confidence for bigger trips. If you can navigate a new town solo, you can navigate anywhere (trust me).
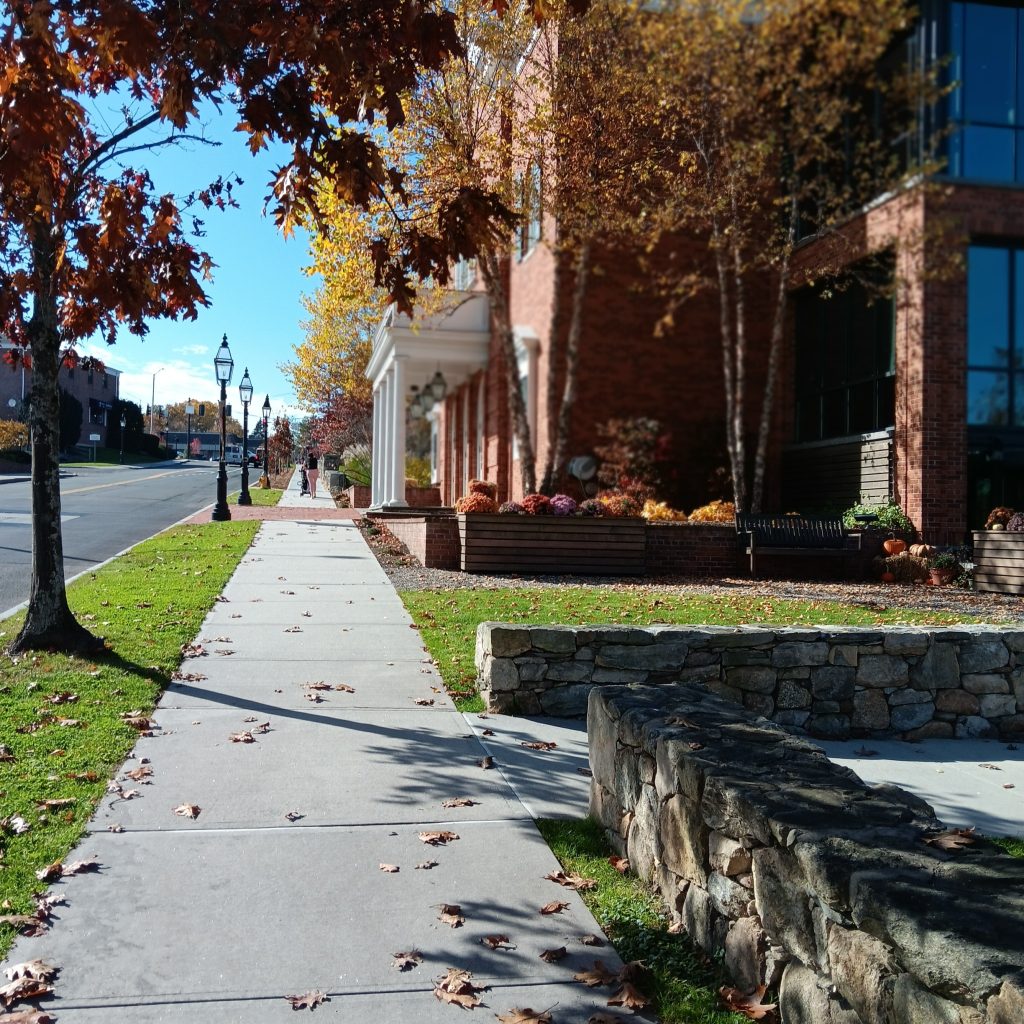
My Story: Ridgefield, Connecticut
I love adventures and experiencing different parts of the world. But I also love exploring local places.
The experience of jumping into a car and getting to my destination 1 to 2 hours later? It comes with its own level of excitement.
One fall Friday, I drove to Ridgefield, Connecticut; a beautiful New England town I’d passed signs for a hundred times but never actually visited.
The fall foliage was spectacular. The main street was lined with historic buildings, local boutiques, and cozy cafes. I wandered without a plan, stopping wherever something caught my eye. I had lunch at a local spot, walked through neighborhoods with beautiful old homes. I took photos like I was a travel blogger documenting a far-off destination.
But I wasn’t far from home. I was less than two hours away.
And that’s the beauty of it. Adventure doesn’t require distance. It requires curiosity.
How to Pick Your Town
Ask yourself:
- What town have I always driven through but never stopped in?
- Where do people from my area go for day trips?
- What small town is known for something specific? (wineries, historic sites, fall foliage, beaches)
Google is your friend:
- “Best day trips from [your city]”
- “Small towns near [your location]”
- “Hidden gems [your state]”
Consider:
- Historic towns with walkable downtowns
- Coastal villages
- Mountain towns
- College towns (usually have good food and culture)
- Wine or farm country
What to Do When You Get There
Wander the main street – Don’t plan every minute. Just walk and see what calls to you.
Skip the chains – Find the local coffee shop and the family-owned restaurant.
Talk to people – Ask locals for recommendations. “What’s your favorite thing about this town?” “Where do you go for lunch?” People love sharing their hometown pride.
Visit something historic – Most small towns have a museum, historic home, or landmark. Learn one new thing.
Take photos – Document it like you would an international trip. You’re a traveler, even if you’re close to home.
Buy something local – Support the local economy. A small souvenir reminds you of your adventure.
Tips
Don’t over-plan – Have one or two things you want to see, but leave room for wandering and discovery.
Bring cash – Just incase the establishment doesn’t take cards, or their machines are “down.”
Check hours – A place might close at 2 PM on weekdays or be closed entirely on Mondays.
Go midweek if possible – Weekends can be crowded with other day-trippers. Tuesdays and Wednesdays are perfect, or a nice Friday afternoon.
Allow for spontaneity – If you see a sign for a farm stand, a hiking trail, or a scenic overlook; stop! That’s where the magic is.
The Mindset Shift
You are not “just” going to a nearby town. You’re practicing being a solo traveler. You are learning to navigate, to be comfortable as a stranger, to trust your instincts about where to go.
This is fun training. And it counts.
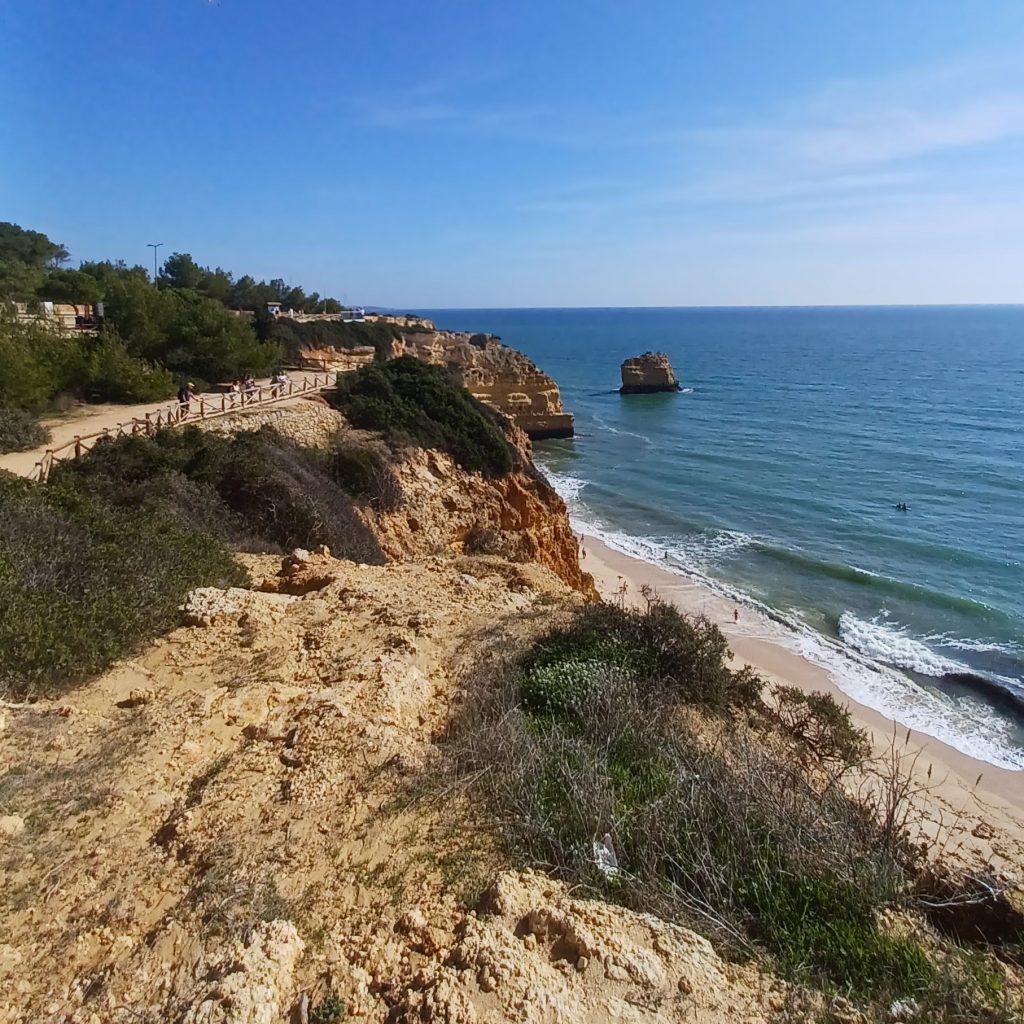
The same confidence you build exploring Ridgefield, CT prepares you for exploring Lisbon, Portugal. The same curiosity that leads you down a side street in a small town will lead you through the souks of Oman.
Start close. Build confidence. Then go anywhere.
Always choose open roads to a new adventure.
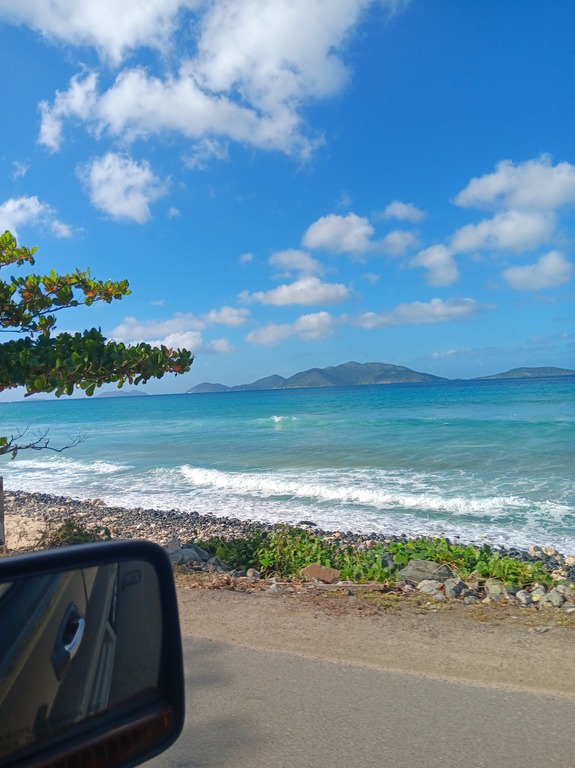
ADVENTURE #3: Solo Beach or Lake Day
What to do: Pack a book, a towel, sunscreen, and yourself. Go to a beach or lake. Spend the day alone.
Why it matters: This adventure teaches you to be comfortable in public alone; no hiding behind a companion. You learn that you don’t need someone else to enjoy an afternoon. You practice pure relaxation on YOUR terms; no negotiating where to sit, when to leave, or how long to stay in the water.
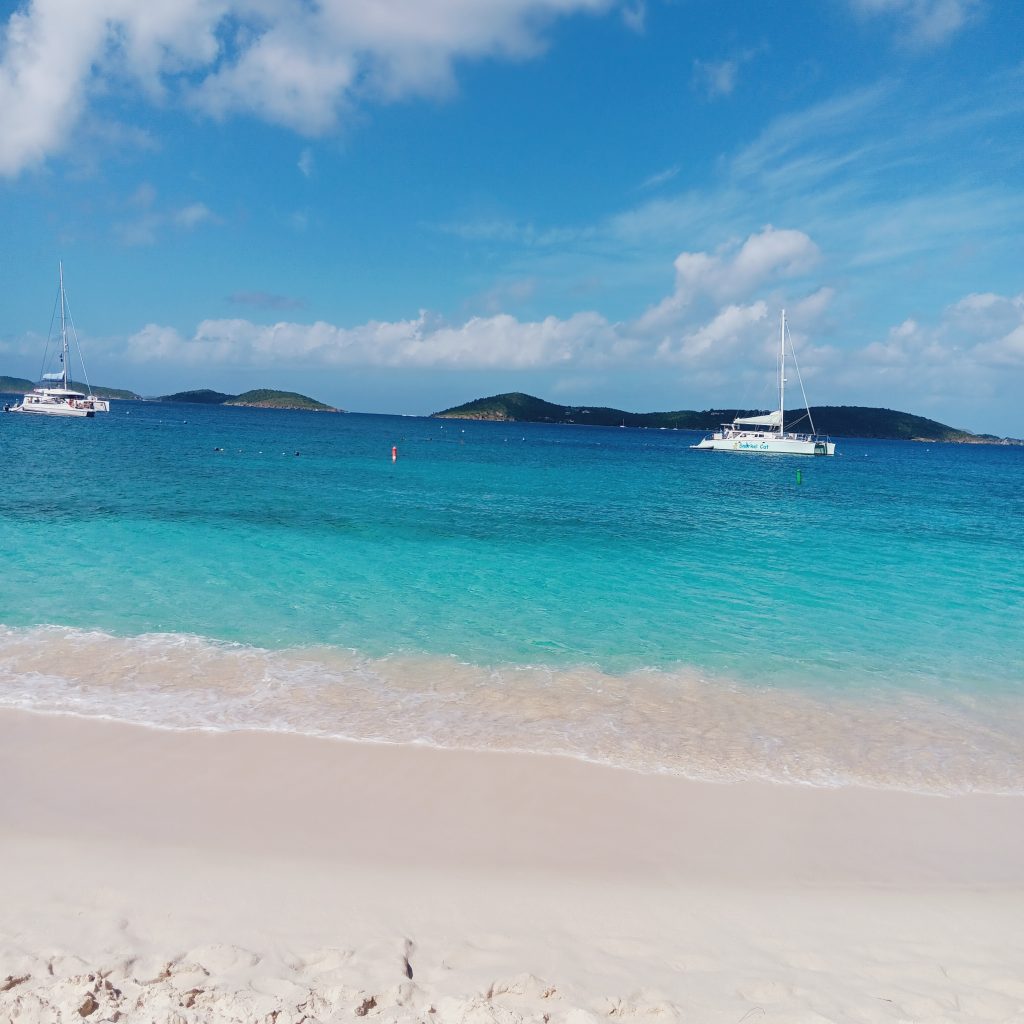
My Philosophy: The Ocean Resets My Soul
There is something about the ocean that truly resets my soul.
When I’m not chasing waves, you’ll probably find me hiking trails or climbing mountains. But I always come back to the water. It’s where I feel the calm.
I’ve beach-hopped my way through the island of St. John. I’ve watched sunsets over the Arabian Sea. I’ve sat on Caribbean shores and Mediterranean coastlines. But some of my most meaningful beach days have been alone, close to home.
Because here’s what a solo beach day teaches you: you are enough company for yourself.
You don’t need someone else to make the day “worth it.” You don’t need to coordinate schedules or compromise on timing. You show up with a towel, a book, and permission to just be (writing this makes me smile about all the wonderful solo beach days).
What Makes a Solo Beach Day Special
You move at your own pace. Want to stay in the water for an hour? Do it. Want to read for three hours straight? No one’s rushing you. Feel like walking the shoreline collecting shells? Go.
You notice more. When you are alone, you are present. You hear the waves differently (I promise you). You feel the sun on your skin. You watch families play, couples walk, solo surfers catch waves. You’re part of the scene, not performing for anyone.
You practice not caring what people think. At first, you might feel self-conscious. “Do people think it’s weird I’m alone?” But after 20 minutes, you realize: no one cares. Everyone’s in their own world enjoying themselves. And that’s liberating.
How to Have Your Solo Beach Day
Pick your spot:
- A beach you know (comfortable, familiar)
- OR a beach you’ve never been to (adds adventure!)
- Weekday mornings = fewer crowds
- Go where there are lifeguards if you are swimming alone
What to bring:
- Beach chair or large towel (comfort matters!)
- Book or journal (or nothing, just you)
- Snacks
- Sunscreen, hat, sunglasses
- Water bottle
- Headphones for music or podcast (optional)
- Camera for photos
- A good mindset
What to do there:
- Swim when you want, for as long as you want
- Read without interruption
- Walk the shoreline
- People-watch (it’s fascinating!)
- Take a nap in the sun (I always do this)
- Watch the waves
- Just breathe
Tips
Timing matters:
- Mornings are quieter and cooler
- Late afternoon has beautiful light for photos
- Midday is hottest but also most lively
Safety first:
- Tell someone where you are going
- Swim near lifeguards
- Keep valuables minimal or locked in your car
- Trust your gut about where to set up
The mental game:
- Bring something to “do” if you need it (book, journal)
- But give yourself permission to do nothing
- If you feel awkward at first, that’s normal
- It gets easier the longer you stay (trust me)
Make it special:
- Bring a fancy coffee or smoothie
- Pack your favorite snacks
- Wear a swimsuit that makes you feel good
- Take photos for yourself (not just for Instagram)
The Ocean Truth
The ocean doesn’t care if you are alone or with someone. It just keeps rolling in, keeps pulling out, keeps existing in its own rhythm.
And when you sit there by yourself, watching those waves, something happens. You start to match that rhythm. Your breathing slows. Your shoulders drop. The noise in your head quiets.
That’s why the ocean resets my soul. And it will reset yours too, my friend.
You don’t need to travel to the Caribbean to experience this. Your local beach or lake works just as well. The water knows what to do.
Show up. Sit down. Let it work its magic.
Adventure #4 - Solo Coffee Shop Morning

What to do: Find a coffee shop you’ve never been to. Sit for at least an hour. Bring nothing but yourself.
Why it matters: This is the smallest possible adventure, and one of the most important. If you can’t sit alone at a coffee shop in your own town, how will you dine alone in a foreign country? This adventure gets you comfortable being alone in public. It teaches you that no one is watching, no one cares, and that’s incredibly freeing.
The Essential Solo Travel Skill
Before I ever traveled internationally solo, I practiced being alone in public at home.
Coffee shops became my training ground. At first, I’d bring my laptop, a “purpose” for being there, something to hide behind. Eventually, I’d bring just a book. Then nothing at all.
That progression taught me something crucial: I don’t need a reason to take up space. I don’t need to be “productive” to justify sitting somewhere. I can just be.
And that skill? It translates everywhere. The confidence to sit alone at a cafe in your hometown becomes the confidence to sit alone at a café in Lisbon, in Oman, in Spain.
What Makes This Adventure Special
It’s accessible. You don’t need special gear, physical fitness, or a full day. You need an hour and the price of a coffee and maybe a delicious warm scone.
It’s uncomfortable (at first). That discomfort is the point. You will feel awkward. You will wonder if people are judging you. You will want to pull out your phone.Then something shifts. After 20 minutes, you realize: no one is watching. Everyone is in their own world. And that realization is powerful.
You start to notice things. The way light comes through the window. Conversations around you. The taste of your coffee (when you are not rushing). Each delicious bite of the warm scone. The thoughts in your own head.
This isn’t just killing time. This is practicing presence.
Your Solo Coffee Shop Experience
Pick your spot:
- A local cafe, not a chain (support local + better atmosphere)
- Somewhere you’ve never been (adds the “new” element)
- Ideally with window seating or outdoor tables
- Bonus: a place known for good coffee
Order intentionally:
- Not your “usual”, try something new
- Take your time at the counter
- Strike up a brief conversation with the barista if you want (or don’t!)
- Sit down before you start drinking (no to-go cup)
What to bring (or not):
- Journal – Write about what you notice, how you feel
- Book – But challenge yourself to just people-watch instead
- Nothing – The ultimate challenge: just you and your thoughts
What NOT to bring:
- Your laptop (this isn’t a work session)
- Your phone scrolling habit (put it on Do Not Disturb)
- The need to look “busy”
What to Do While You’re There
The first 10 minutes: You will feel awkward. That’s normal. Order your coffee. Find your seat. Settle in. Resist the urge to immediately pull out your phone.
The next 20 minutes: Look around. Watch people. Notice the details. The art on the walls. The music playing. The way the barista makes drinks. The couple in the corner. The person working alone. You are part of this scene too.
The next 30 minutes: This is where it gets good. You’ve stopped feeling self-conscious. You are present. Maybe you journal. Maybe you just sit. Maybe you strike up a conversation with someone nearby. Maybe you don’t. Both are fine.
The challenge: Can you sit there for a full hour without feeling the need to justify your existence by “doing something”?
What You will Learn
No one is watching you. Everyone is too busy with their own lives, their own thoughts, their own coffee. You are free.
Being alone is not lonely. You can be surrounded by people and still be peacefully alone. That’s different from isolation. That’s intentional solitude.
You are enough company for yourself. You don’t need someone across from you to make the experience worthwhile. You are the experience.
Small talk is optional. Sometimes the barista will chat. Sometimes the person next to you will comment on your book. Sometimes you will sit in complete silence.
All of these are okay.
Tips
Timing matters:
- Weekday mornings are quieter (fewer laptop workers)
- Weekend mornings are livelier (more community vibe)
- Avoid peak hours (too rushed, harder to find a seat)
Location choices:
- Window seat: people-watching + natural light
- Corner spot: feels more private if you are nervous
- Outdoor table: weather permitting, feels more open
- Counter seat: easier for solo diners (if they have one)
Phone discipline:
- Put it face down on the table
- Or keep it in your bag or pocket
- If you must check it, set a timer: 5 minutes of scrolling max
- The point is to be present, not distracted
The barista test:
- Order with confidence (even if you are nervous)
- Make eye contact
- Say thank you
- This small interaction is practice for solo travel
Journaling prompts (if you bring a journal):
- What do I notice about this space?
- How does it feel to be here alone?
- What am I avoiding by always being busy?
- When was the last time I just sat?
The Bigger Picture
This coffee shop morning isn’t about the coffee. It’s about training yourself to be comfortable in your own company.
It’s about learning that you don’t need external validation or constant productivity to justify existing in a space.
It’s about building the foundation for every solo adventure that comes after this one.
If you can do this; sit alone at a coffee shop for an hour without feeling awkward, you can do anything.
You can dine alone at restaurants. You can travel solo to foreign countries. You can navigate the world on your own terms.
It starts here. With a coffee and a warm scone. And an hour. And the courage to simply just be.
ADVENTURE #5: Museum or Gallery Solo Visit

What to do: Pick a museum, art gallery, or historic site. Go alone. Spend as long (or as short) as you want at each exhibit.
Why it matters: This adventure teaches you the freedom of following your own curiosity without compromise. No rushing someone through the rooms you love. No dragging along to the sections that bore you. Just you, exploring at exactly your pace, discovering what actually interests you, not what you think should interest you.
The Freedom to Follow Your Curiosity
I’ve been to museums with friends, with family, with partners. And there’s always negotiation. “Are you ready to move on?” “Should we skip this section?” “How much longer do you want to stay?”
But when you go alone? You answer to no one but yourself.
You can spend 30 minutes staring at one painting that moves you. You can walk past an entire wing that doesn’t speak to you. You can read every single placard or read none of them. You can leave after 20 minutes or stay for three hours.
This is your exploration. Your pace. Your curiosity leading the way.
What You’ll Discover
What you actually like. When no one’s watching, when you’re not performing interest for someone else, you discover what genuinely captivates you. Maybe it’s not the famous pieces everyone photographs. Maybe it’s the small exhibit in the corner. Maybe it’s the architecture itself. You get to find out.
How you naturally move through space. Do you read everything chronologically? Jump to what catches your eye? Circle back multiple times? There’s no right way, but going solo lets you discover your way.
The joy of accidental discoveries. Without someone pulling you along or waiting for you, you notice the small things. The detail in a sculpture. The way light hits a gallery room. The handwritten note next to an artifact. These moments only happen when you’re fully present.
That you can think your own thoughts. In a group, you’re often discussing, reacting, sharing observations. Alone, you process internally. You think without interruption. Some of your best insights happen in this quiet space.
How to Have Your Museum Day
Choose your museum:
- Art museum – Visual beauty, emotional response, interpretive freedom
- History museum – Stories, context, learning something new
- Science museum – Interactive, engaging, hands-on
- Local historic site – Connects you to your area’s past
- Small gallery – Intimate, less overwhelming, often free
Pick based on:
- What genuinely interests you (not what’s “impressive”)
- What you’ve been meaning to see but haven’t
- What’s having a special exhibit
- What’s free or discounted (many museums have free days!)
Check before you go:
- Hours (many museums close one day a week)
- Admission cost (student/senior/member discounts?)
- Special exhibits (worth the extra ticket?)
- Whether audio tours are available
- If photography is allowed
Your Visit Strategy
Arrival:
- Go on a weekday if possible (fewer crowds)
- Aim for opening time or late afternoon (quieter periods)
- Get a map but don’t feel obligated to see everything
- Check for free tours (you can listen and still be “alone”)
As you explore:
- Start with what calls to you – Not Room 1 just because it’s first (Read about my experience beach hopping on St. John Island, not following any particular order)
- Linger where you want – That painting you can’t stop looking at? Stay.
- Skip what doesn’t speak to you – No guilt. Move on.
- Sit when you can – Many galleries have benches. Use them. Observe.
- Read what interests you – Plaques, audio guides, wall text—or none of it
- Take photos (if allowed) – But also put your phone down and just look
Give yourself permission:
- To not see everything
- To leave when you’re saturated (museum fatigue is real!)
- To return to the same room multiple times
- To spend your whole visit in one section
- To leave after 20 minutes if you’re done
What to Bring
Essential:
- Comfortable shoes
- Water bottle (many museums allow them)
- Light jacket (museums are often cold)
- Small bag for tickets, phone, wallet
Optional:
- Notebook for thoughts/sketches
- Phone/camera (if photography allowed)
- Headphones for audio guide
Leave behind:
- Large bags (many require check-in anyway)
- The need to see everything
- Judgment about what you “should” like
Tips
The audio guide question:
- Some people love them (adds context, storytelling)
- Some find them distracting (breaks your own thought process)
- Try it once, decide for yourself
The museum cafe:
- Many have cafés, perfect for a reflective coffee break
- Sit, journal about what you saw
- Process before jumping back in
The gift shop:
- Don’t skip it! Small souvenirs remind you of your adventure
- Postcards of pieces you loved
- Books about exhibits that moved you
- Support the museum while creating a memory
Weekday mornings are magic:
- Fewer people
- Natural light at its best
- Staff more available to chat if you have questions
- Feels like you have the place to yourself
Making It Meaningful
Before you go: Set an intention. What are you curious about? What do you want to feel? What are you open to discovering?
While you’re there: Notice what stops you in your tracks. What makes you lean in closer? What makes you feel something? Follow that rythm.
After you leave: Sit at a nearby cafe. Journal. What stood out? What surprised you? What do you want to remember?
The deeper practice: This isn’t about becoming an art expert or checking off cultural boxes. It’s about learning to trust your own curiosity, honor your own pace, and find meaning in your own way.
What This Prepares You For
When you travel solo internationally, you’ll visit museums, monuments, historic sites. You will navigate them alone. You will make choices about what to see, what to skip, how long to stay.
This adventure in your own city prepares you for that. It builds the muscle of self-directed exploration. It teaches you that you don’t need someone else to validate your experience or make it worthwhile.
You can stand alone in front of something beautiful or meaningful or strange, and that’s enough.
YOUR ARE ENOUGH
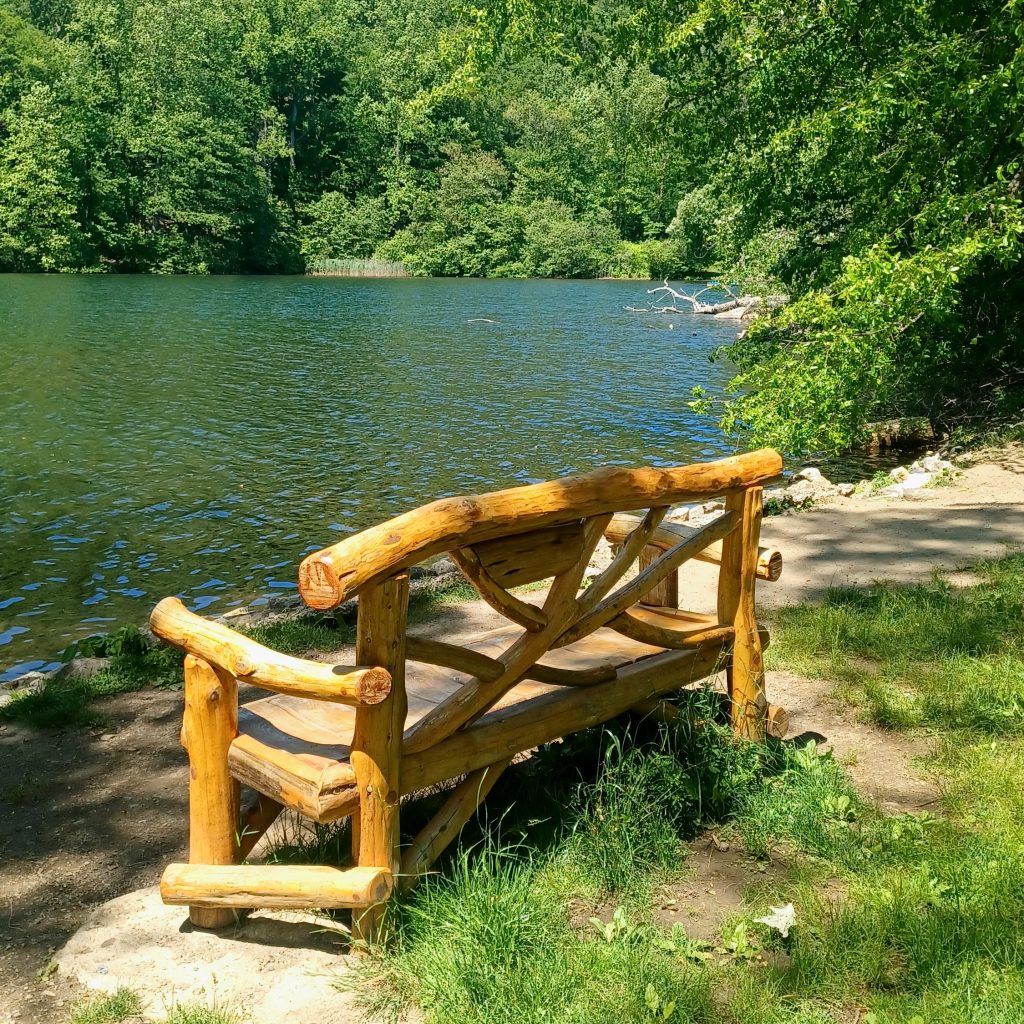
ADVENTURE #6: Solo Picnic in a Park

What to do: Pack your favorite foods. Find a park or scenic spot. Have a picnic alone.
Why it matters: This adventure teaches you to romanticize your own company. To make an ordinary act, eating, into something intentional and special, without needing someone else to make it “worth it.” It’s practice for treating yourself well, for making your own experience feel special, for understanding that self-care isn’t selfish; it’s essential.
Romanticizing Your Own Company
We wait for someone else to have a picnic with. We wait for the perfect group outing. We wait for an invitation that makes it “count.”
But what if you stopped waiting?
What if you packed the foods you love, found a beautiful spot, and made it special for yourself?
That’s not sad. That’s not lonely. That’s intentional.
The Shift in Perspective
When you plan a picnic for yourself, something changes. You’re not just grabbing food and eating it. You’re creating an experience.
You think about what you actually want to eat, not what’s easy, not what someone else prefers. You choose the spot carefully. You bring a blanket or a chair. You sit down deliberately. You eat slowly.
This is the opposite of eating lunch at your desk while scrolling your phone. This is presence. This is treating yourself the way you’d treat someone you care about.
And that matters. Because if you can’t do this for yourself, how will you navigate solo travel? How will you sit at a restaurant alone without feeling sorry for yourself? How will you enjoy your own company on the road?
It starts here. With a sandwich in the park.
Your Solo Picnic Experience
Choose your spot:
- A park you love (familiar and comforting)
- A park you’ve never been to (adds exploration)
- By water if possible (lakes, rivers, ocean; something about water makes it better)
- Under a tree for shade
- With a view (sunset picnics are magic)
- Somewhere you can spread out and stay awhile
What to bring:
Food:
- Things YOU love (not what you “should” eat)
- Foods that feel special
- A little dessert (because why not?)
- Something to drink (make it feel intentional)
- Real plates and utensils if you want (not just plastic—elevate it!)
Comfort:
- A blanket or portable chair
- Pillow or cushion (comfort matters!)
- Napkins
- Hand wipes
Extras:
- A book (in case you want to read)
- Journal (in case you want to write)
- Music (small speaker or headphones—or enjoy the natural sounds)
- Camera (capture the moment for yourself)
What NOT to bring:
- Your phone addiction (put it on Do Not Disturb if you can)
- Any guilt about “wasting time”
- The need to document everything for social media
How to Make It Special
The preparation matters: Don’t just grab whatever’s in your fridge. Go to a bakery. Pick up fresh fruit. Get the good cheese. Choose things that feel like a treat.
Pack it nicely. Use actual containers, not crumpled bags. Wrap your sandwich. Put the fruit in a bowl. This isn’t about being fancy, it’s about caring enough to make it nice for yourself.
The setup matters: Don’t just plop down anywhere. Find your spot. Spread out your blanket. Arrange your food. Make it inviting. You’re creating a small sanctuary for yourself.
The eating matters: Eat slowly. Taste your food. Notice the flavors. Look around. Watch people. Watch trees. Watch clouds. Be present with the act of eating instead of rushing through it.
The staying matters: Don’t pack up the moment you finish eating. Linger. Lie back. Read. Journal. Just sit. Give yourself the gift of unhurried time.
What You’ll Notice
Time slows down. When you are not rushing, when you are fully present, even an hour feels luxurious.
Small details become beautiful. The way the sun filters through leaves. The sound of kids playing nearby. The taste of grapes. The feeling of grass under your blanket.
You feel cared for. Because you cared for yourself. You made this happen. You created this moment. That feels good.
Other people don’t care that you’re alone. Families having picnics, couples on blankets, groups of friends, and you, solo. And guess what? No one is judging you. Everyone’s in their own world. You’re just part of the park scene.
You might not want it to end. That’s when you know you’ve done it right.
Tips
Timing:
- Late afternoon into sunset (beautiful light, cooler temps)
- Weekend mornings (parks come alive but aren’t crowded yet)
- Avoid midday summer heat (unless you have shade)
Weather check:
- Bring a backup plan (can you move to a covered pavilion if it drizzles?)
- Sunny days: bring sunscreen, hat, sunglasses, lots of water
- Breezy days: bring something to weigh down your blanket
Safety:
- Choose well-populated parks (especially if you are new to this)
- Keep valuables minimal
- Tell someone where you are (same rule as always)
- Trust your gut about your spot
Make it a ritual:
- Same park, different seasons
- Same spot, different foods
- Weekly solo picnic dates with yourself
- Document it (photos for you, not just Instagram)
The Deeper Truth
This picnic isn’t really about the food. It’s about learning to create beautiful moments for yourself without needing external validation.
It’s about understanding that you deserve care, attention, and intention – from yourself.
It’s about practicing the kind of intention that says: I am worth this. My experience matters. My enjoyment counts.
When you can do this; sit alone on a blanket in a park, eating food you chose, feeling completely content; you’ve learned something essential.
You’ve learned that you’re enough. That your company is valuable. That you can make your own life beautiful.
And that skill? That translates everywhere. To solo dinners in foreign countries. To sunset watching alone. To entire trips where you are your own best companion.
It starts with a picnic. And it changes everything.
ADVENTURE #7: Scenic Drive to Nowhere
What to do: Get in your car. Pick a direction. Drive for an hour with no destination. Stop when something catches your eye.
Why it matters: This adventure strips away the need for a plan, a goal, or a justification. It teaches you that the journey itself is the destination. That exploration doesn’t need a purpose beyond curiosity. That some of the best discoveries happen when you’re not looking for anything specific. You are just open to what you find.
The Permission to Wander
We are so conditioned to have a destination. A reason. A point.
“Where are you going?” becomes the first question.
But what if the answer is: nowhere? What if the point is the driving itself?
This adventure removes the pressure of arrival. You’re not going to see something specific. You’re not checking off a landmark. You’re just… going.
And in that openness, magic happens (I promise).
What This Feels Like
There’s something meditative about driving with no agenda. The hum of the road. The changing scenery. Your thoughts drifting. Music playing. The sun shifting position as time passes.
You’re moving, but you’re also still. Present. Noticing.
A sign catches your eye – “Scenic Overlook 2 miles.” You take it.
A farm stand appears. You stop and grab a snack.
A small town main street looks charming. You pull over and walk around.
None of this was planned. All of it becomes part of your adventure.
Your Scenic Drive Experience
Before you leave:
- Fill up your gas tank (nothing ruins a drive like worrying about running out)
- Check your spare tire (just in case—safety first)
- Download offline maps (in case you lose signal)
- Tell someone your general direction (safety always)
- Charge your phone (for photos and emergency)
Choose your direction:
- Away from the city (less traffic, more scenery)
- Toward something general: mountains, coast, countryside
- Follow signs that say “Scenic Route” or “Byway”
- OR just pick: north, south, east, west—and go
Create the vibe:
- Music or podcast (curate a playlist that matches the mood you want)
- Or silence (let your thoughts be the soundtrack)
- Windows down (feel the air, hear the world)
- Phone on Do Not Disturb if You Can (no distractions)
What to Do Along the Way
Follow curiosity:
- See a sign for a viewpoint? Take it.
- Notice a road that looks interesting? Turn.
- Spot a small town? Stop and walk the main street.
- Find a farmer’s market? Browse.
- See a hiking trail? Take a short walk.
Stop when you feel like it:
- Pull over at scenic overlooks
- Take photos (for you, not just Instagram)
- Stretch your legs
- Breathe the air
- Just stand there and look
Talk to people (if you want):
- Gas station attendant: “What’s worth seeing around here?”
- Local shop owner: “Where do you go on weekends?”
- Fellow traveler at an overlook: “First time here?”
- Or don’t talk to anyone. Both are fine.
Get intentionally “lost”:
- Turn off GPS
- Take roads you don’t recognize
- Follow signs to places you’ve never heard of
- Trust that you can always find your way back
What You’ll Discover
Hidden gems. The places that aren’t on tourist maps. The waterfall only locals know about. The bakery in a town of 400 people that makes the best bread you’ve ever tasted. The overlook with no name that takes your breath away.
Your own thoughts. Without the noise of daily life, your mind wanders. Processes. Solves problems you didn’t know you were working on. Sometimes the best thinking happens on a drive to nowhere.
That you don’t need a plan to have an adventure. Some of the best experiences can’t be planned. They happen when you are open, curious, and willing to follow wherever the road leads.
Your own company is enough. Hours can pass. You don’t get bored. You don’t need someone in the passenger seat to make it worthwhile. You and the road, that’s enough.
Tips
Timing:
- Late afternoon into sunset (the light is magic)
- Early morning (roads are empty, towns are waking up)
- Avoid rush hour if leaving from a city
Bring along:
- Water and snacks (you might be out longer than planned)
- Sunglasses
- Cash (small towns sometimes don’t take cards)
- Camera or phone for photos
- Comfortable clothes
- Light jacket (even in summer—temps change)
Safety essentials:
- Know your general area (even if you’re “lost,” you’re not actually lost)
- Keep an eye on gas gauge
- Have a backup plan if weather changes
- Save your route on your phone (screenshot or pin locations you loved)
- Don’t drive tired—pull over if you need to rest
The “I found something” stops:
- Roadside fruit stands
- Small town diners
- Antique shops
- Historic markers
- Scenic picnic areas
- Unmarked dirt roads that look intriguing
Make It Memorable
Document it differently: Instead of dozens of photos, try:
- One photo at each stop
- Journal entry when you get home: “Where I went, what I found, how I felt”
- Save one small thing: a receipt from that diner, a postcard from that town, a rock from that overlook
- Mark the route on a map afterward
The sunset moment: If you time it right, find a spot to watch sunset. Pull over safely. Get out of your car. Watch the sky change. That moment, simply standing somewhere you’ve never been, watching the sun set, knowing you found this place by wandering; that’s the whole point.
What I Remember
On my way back down the mountain from Jebel Shams, the sunset painted the sky. I looked in the rearview mirror and saw the mountain glowing in the last light of day.
It was such a quiet joy.
Not the destination. Not the famous overlook. Just that drive. That moment. That view in the mirror.
Some of the best parts of any journey happen in between the “main events.”
On the drives. On the roads. In the unexpected moments when you’re just moving through the world with open eyes.
The Deeper Truth
This adventure teaches you to let go of the need for everything to have a purpose, a plan, a point.
Sometimes the point is the experience itself. The freedom. The movement. The discovery.
When you can get in a car and drive to nowhere, and enjoy every moment of it, you’ve learned something essential about adventure:
It’s not about the destination. It never was.
It’s about being present for the journey. All of it. Even the parts that aren’t on the map.
Adventure #8 - Local Farmer's Market!
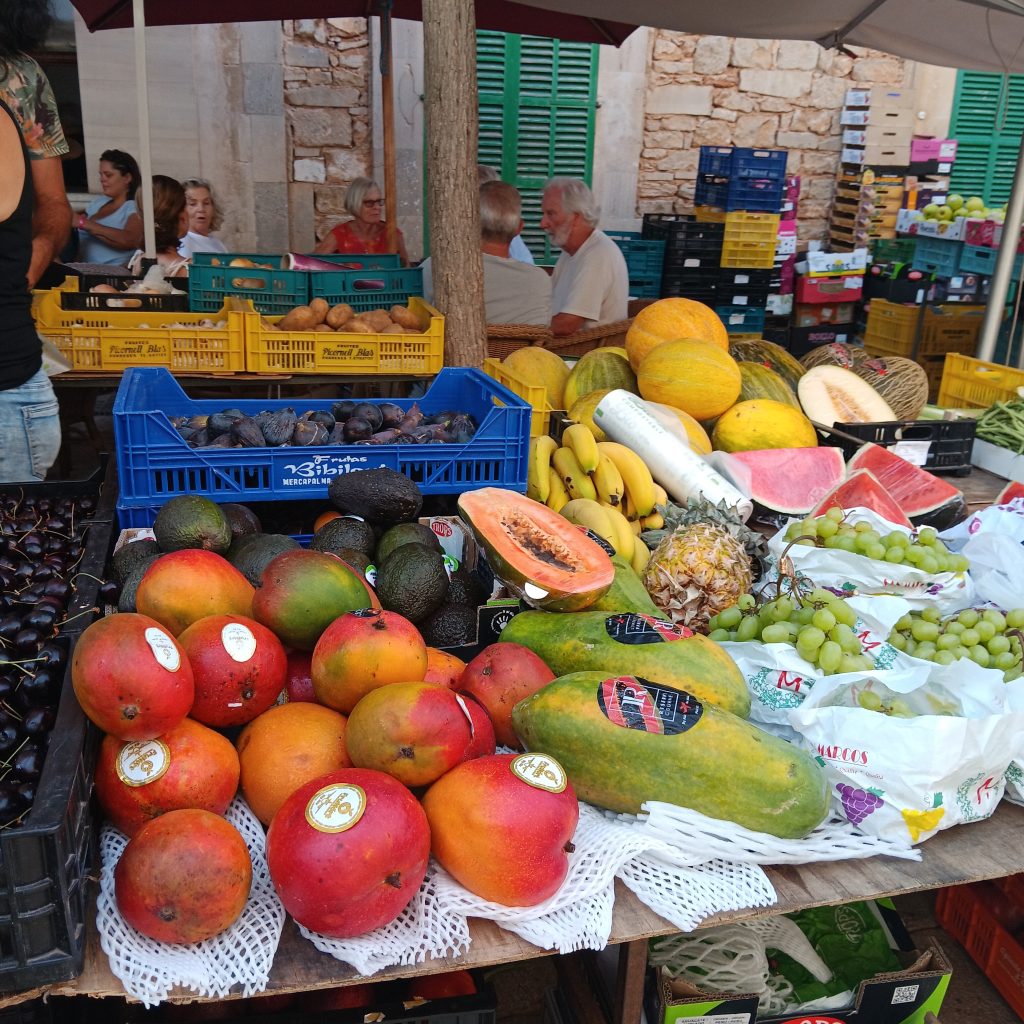
What to do: Find your local farmer’s market. Go alone. Wander. Talk to vendors. Buy something new you’ve never tried.
Why it matters: This adventure is perfect practice for solo travel because it combines everything: navigating a new environment, making small talk with strangers, trying unfamiliar things, and being comfortable in a social space alone. Farmer’s markets are welcoming, low-pressure, and full of kind people. It’s the ideal training ground for the confidence you will need abroad.
The Perfect Practice Ground
Before I ever wandered through the souks of Nizwa, Oman, navigating stalls, talking to vendors, bargaining, trying new food, I wandered around farmer’s markets at home.
The skills are the same. The confidence builds the same way.
You’re alone in a bustling, social environment. People are friendly. Conversations happen naturally. You are trying things you can’t pronounce. You are navigating without a map.
It feels like travel. But it’s 20 minutes from your house.
What Makes This Special
It’s sensory. The colors of fresh produce. The smell of baked bread and fresh flowers. The sounds of conversations. The taste of samples. You are fully immersed in the experience.
People want to talk to you. Vendors love sharing about their products. They’re passionate. They’re proud. Ask a question, any question, and they light up. This is the opposite of cold retail. This is human connection.
You discover things. Vegetables you’ve never heard of. Fruits you didn’t know existed. Honey from a farm five miles away. Bread from someone’s home oven. These aren’t things you find in a grocery store.
You support your community. Every dollar goes directly to local farmers, bakers, artists. You are part of something bigger than just shopping. You are supporting real people.
Your Farmer’s Market Experience
Find your market:
- Google: “[your city] farmer’s market”
- Check local community boards or Facebook groups
- Ask neighbors where they go
- Look for weekend morning markets (most common)
What to expect:
- Usually outdoors (dress for weather)
- Cash is king (many vendors don’t take cards)
- Reusable bags are appreciated
- Samples are common (try everything!)
- Dog-friendly, kid-friendly, everyone-friendly
When to go:
- Early (8-9 AM): Best selection, vendors are fresh and chatty
- Mid-morning (10-11 AM): Busiest, most energy, live music usually starts if there is any
- Late (last hour): Deals on leftover produce, quieter, vendors ready to chat
How to Wander Like a Local
First lap: just look. Walk through the entire market without buying anything. Notice what catches your eye. See what’s available. Get a sense of the layout. Resist the urge to buy the first thing you see.
Second lap: engage. Now start talking to vendors. Ask questions. Try samples. This is where the adventure happens.
Questions that start conversations:
- “What’s in season right now?”
- “How do you prepare this?” (pointing at something unfamiliar)
- “How long have you been farming/baking/making this?”
Vendors LOVE these questions. You will learn things. You might get tips on recipes. You might hear stories about their farm. Connection happens naturally.
Third lap: buy. Now you know what you want. Circle back to the stalls that called to you. Buy something new you’ve never tried. Buy your favorites. Support the vendors who made you smile.
The Solo Traveler Skills You’re Building
Small talk with strangers. Every vendor interaction is practice. You are learning to initiate conversation, ask questions, be friendly with people you don’t know. This is essential for solo travel.
Trying new things. That weird-looking vegetable? That unusual fruit? That artisan cheese? Saying yes to the unfamiliar. This is how you will navigate food abroad.
Being alone in crowds. You are surrounded by people – families, couples, friend groups. And you are solo. And it’s completely normal. No one cares. You are just part of the scene.
Navigating without a map. Markets don’t have aisles or signs. You wander. You get a little turned around. You find your way. Just like you will in foreign cities.
Making decisions independently. No one to ask “Should I get this?” You decide. You choose. You trust your own judgment.
What to Buy
Your mission: Buy at least ONE thing you’ve never tried before.
Ideas:
- A vegetable you can’t name
- An unusual fruit
- Artisan bread
- Local honey
- Fresh herbs
- Handmade jam
- Farm-fresh eggs
- Flowers (for yourself -no special occasion needed)
- Hot sauce, pickles, or preserves
- Something from a vendor who seemed especially kind
The rule: If you don’t know how to prepare it, ASK. Vendors will happily share recipes, cooking tips, and their favorite ways to eat their products.
Tips
Bring:
- Reusable bags
- Cash
- Water bottle (if needed)
- Sunscreen and hat (if outdoors)
- Open mind and appetite
Don’t bring:
- A detailed shopping list (defeats the spontaneity!)
- The need to buy everything (focus on a few quality items)
- Judgment about prices (local, quality food costs more, it’s worth it)
Make it social (if you want):
- Chat with other shoppers: “Have you tried this before?”
- Ask vendors for recommendations for other stalls
- Or don’t talk to anyone – both are fine!
The Challenge
Can you:
- Strike up three conversations with vendors
- Try at least one sample of something unfamiliar
- Buy something you’ve never cooked before
- Stay for at least an hour
- Enjoy being solo in a bustling, social space
If yes, you ae ready for international markets. For food tours. For navigating foreign grocery stores. For all of it.
What You’ll Notice
People are kind. Vendors want you to succeed with their products. Other shoppers will recommend stalls. Someone will help you carry your bags to your car. Humanity shows up at farmer’s markets.
You feel connected. To your community. To the earth. To the seasons. To real people making real things. It’s grounding in the best way.
You want to come back. This becomes a ritual. A Saturday morning tradition. A way to start the weekend that feels intentional and good.
You are building confidence. Every conversation. Every new food. Every solo hour in a social space. You are training for bigger adventures without even realizing it.
The Bigger Picture
When I wandered through the souk in Nizwa, Oman, I wasn’t nervous.
I knew how to navigate crowded stalls. I knew how to ask vendors questions. I knew how to try unfamiliar foods. I knew how to be comfortable being the stranger.
This is practice. And it’s joyful. And it counts.
Adventure #9 - Tourist in Your Own City!
What to do: Visit the tourist attractions in your own city or region. The ones you’ve “been meaning to” visit but never have. Explore your home like you’re seeing it for the first time.
Why it matters: This adventure flips your perspective. You’ve walked past these places a hundred times thinking “I’ll do that someday.” Today is that day. This teaches you to see the familiar with fresh eyes, to appreciate what’s right in front of you, and to stop taking your own backyard for granted. It also prepares you for being a tourist elsewhere. You practice navigation, asking for directions, taking photos, being comfortable exploring alone.
The Places You’ve Never Seen
I’ve climbed Mount Kilimanjaro. I’ve explored Oman’s canyons. I’ve hiked Italy’s coastlines.
But ask me about certain landmarks in the state I live in, and I’d have to admit: I’ve never been. Ask me about certain landmarks in Ghana, where I grew up, and I’d admit: I’ve never been.
We do this. We skip what’s close. We save it for “someday.” We think tourists are silly for visiting things we ignore.
But what if we became tourists in our own cities? What if we finally saw what’s been here all along?
The Tourist Mindset
When you travel somewhere new, you’re curious about everything. You want to see the famous sites. You take photos. You read plaques. You ask questions. You are open to wonder.
Now bring that mindset home.
Walk the streets you usually drive. Visit the museum you pass every day. Go to the overlook, the historic site, the landmark, the neighborhood everyone talks about.
See your home through a visitor’s eyes. You will be surprised what you notice.
Your Tourist Day Experience
Make a list of places you’ve always meant to visit:
Examples (adjust to YOUR area):
- That famous bridge you’ve never walked across
- The historic district you’ve never explored
- The museum everyone raves about
- The observation deck with the view
- The beach/park/trail locals love
- The neighborhood known for food/art/history
- The botanical garden, zoo, or aquarium
- The monument, memorial, or historic building
- The market or shopping district
- The scenic drive everyone takes
Pick ONE for today (don’t try to do everything, that’s exhausting, not fun).
How to Be a Tourist
Before you go:
- Research like a visitor would: Read about the place online, check reviews, find out what’s special about it
- Check hours and admission: Some places require tickets or close certain days
- Plan transportation: Where will you park? Is public transit easier? (Taking transit adds to the tourist experience!)
- Pack like a tourist: Camera, comfortable shoes, water, snacks, small backpack
While you’re there:
Act like you’ve never been:
- Take the guided tour (even if it seems touristy, you will learn things!)
- Read every sign and plaque
- Take photos from all the classic angles
- Buy a postcard or souvenir
- Get the overpriced snack at the tourist spot (it’s part of the experience!)
Talk to people:
- Ask questions of staff/guides: “What’s your favorite thing here?”
- Strike up conversations with other visitors: “First time here?”
- Ask locals for recommendations: “What else should I see in this area?”
Take your time:
- Don’t rush (you’re not checking a box, you are experiencing)
- Sit on benches and people-watch
- Linger in rooms/areas that interest you
- Take different routes on your way out. See it from new angles
Document it:
- Take photos for YOU (not just Instagram)
- Journal about it later: “What surprised me? What did I learn?”
- Collect something small: a ticket stub, a map, a postcard
What You’ll Discover
Your city is more interesting than you thought. The stories behind places. The architecture you never noticed. The views you took for granted.
You missed a lot living here. All those years of driving past without stopping. All those times you said “I’ll do that later.” You had no idea what you were missing.
Being a tourist is fun. Taking photos. Buying souvenirs. Asking questions. Learning things. There’s a joy in approaching everything with fresh curiosity.
Your area has hidden gems. That neighborhood you’d never explored. That viewpoint you didn’t know existed. That historical fact that changes how you see your home.
You feel proud. Of where you live. Of what your area offers. You can recommend things to visitors now with actual knowledge.
Tips
Go solo: Yes, this could be fun with friends, but doing it alone changes the experience. You move at your own pace. You’re more likely to talk to strangers. You’re fully present instead of chatting the whole time.
Go midweek if possible: Tourist spots are PACKED on weekends. Go Tuesday morning and you might have the place to yourself.
Combine it with other mini-adventures:
- Take public transit there (new experience!)
- Eat at a restaurant in that area you’ve never tried
- Walk instead of drive between nearby spots
- Stop at a coffee shop and journal about what you saw
The photo challenge: Take at least 10 photos. Not for social media, for you. Capture what surprises you. The details. The moments. The “I can’t believe I’ve never been here” shots.
Talk to one stranger: Ask someone to take your photo. Strike up a conversation with another solo visitor. Ask a local for a recommendation. Practice the social skills you’ll need traveling.
Specific Ideas by Area Type
If you live near a major city:
- Walk across the famous bridge
- Visit the observation deck
- Tour a historic building
- Explore a neighborhood known for culture/food/art
- Take a boat tour or ferry
- Visit the main library or art museum
If you live in a smaller town:
- Visit your local historical society/museum
- Walk the main street like you’re new here
- Find the scenic overlook everyone mentions
- Visit the local park/garden/nature area
- Take a historic walking tour (many towns offer them!)
- Find the spot known for sunset/views
If you live near nature:
- Visit the state park you always pass
- Hike the “famous” local trail
- Find the waterfall/viewpoint/beach everyone talks about
- Drive the scenic byway
- Visit the lighthouse/overlook/natural landmark
The Challenge
Today, you will:
- Visit ONE tourist spot you’ve never been to
- Spend at least 2 hours there (don’t rush it)
- Take the tourist approach (photos, questions, souvenirs)
- Talk to at least one person (staff, visitor, local)
- Learn three new facts about the place or your area
- Enjoy being a tourist in your own home
What This Prepares You For
When you travel solo to a new city, you’ll need to navigate tourist sites alone. You’ll take photos of yourself (or ask strangers). You’ll read maps. You’ll feel conspicuous as “the tourist.”
This adventure prepares you for that.
You practice being okay standing alone at an overlook taking photos. You practice asking someone to take your picture. You practice navigating, exploring, being curious.
And you realize: being a tourist isn’t embarrassing. It’s fun. It’s how you learn. It’s how you experience places fully.
The Perspective Shift
After this adventure, you wil never drive past that place the same way again. You will think: “I’ve been there. I know that story. I’ve stood at that spot.”
Your relationship with your home changes. It’s not just where you live, it’s a place worth exploring.
And when someone visits you and asks “What should I see?” you will have real answers. Not “I don’t know, I’ve never actually been there.” But “You have to go here. Let me tell you about it.”
You become connected to your place. Rooted. Proud.
The Truth
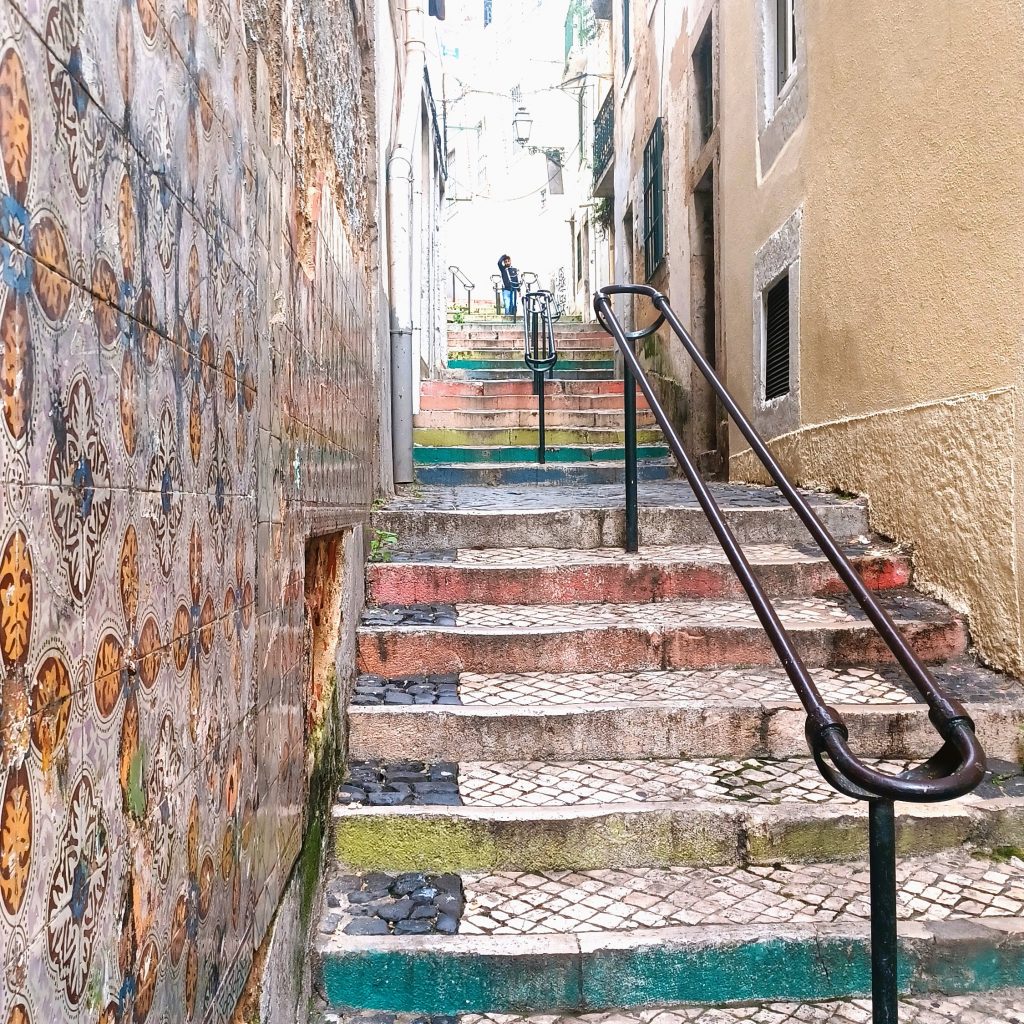
I’ve wandered cobblestone streets in Lisbon. I’ve explored souks in Oman. I’ve hiked trails in Italy.
But I’ve also explored places within an hour of my home that I’d ignored for years.
And both kinds of adventures taught me the same thing: you don’t have to go far to discover something new. You just have to show up with curiosity.
Adventure isn’t about distance. It’s about perspective.
See your world like a tourist. You will be amazed what’s been there all along.
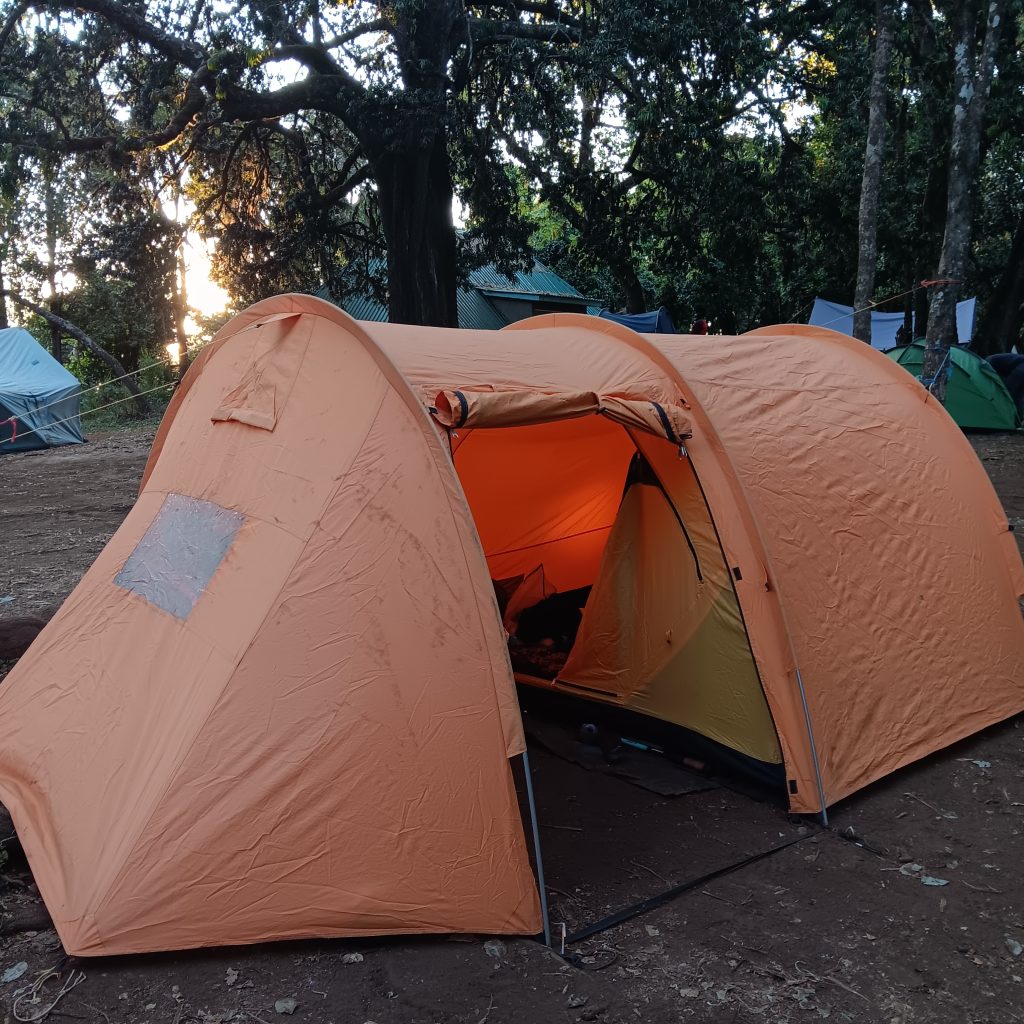
Adventure #10: Solo Weekend Camping Trip
Cost: $30-80 (campsite fee + food)
Time Needed: Friday night through Sunday morning
Confidence Level: Intermediate
What You Will Learn: Self-reliance, outdoor living skills, nighttime confidence
Why This Adventure Matters
If sunrise hikes teach you to be alone in nature during the day, camping teaches you to be alone in nature at night.
This is the adventure that separates “I like hiking” from “I’m genuinely comfortable outdoors.”
And here’s the secret: car camping at an established campground is SO much easier than people think. You’re not backpacking into the wilderness. You’re literally parking next to your tent. You can bring a cooler. You can charge your phone in your car. You can leave if you hate it.
But you won’t hate it. You’ll surprise yourself.
The Detailed Itinerary
Friday Evening
- 4:00 PM: Pack your car (checklist below)
- 5:30 PM: Arrive at campground, check in
- 6:00 PM: Set up tent while it’s still light (CRUCIAL!)
- 6:30 PM: Organize your campsite, prep dinner area
- 7:00 PM: Make dinner (keep it simple – think foil packets or one-pot meals)
- 8:00 PM: Build a small fire (if allowed), make s’mores
- 9:00 PM: Stargazing, journaling, reading by headlamp
- 10:00 PM: Sleep (wear layers, you will be warmer than you think)
Saturday Morning
- 7:00 AM: Wake to sunrise, make camp coffee
- 8:00 AM: Breakfast (oatmeal, granola, whatever’s easy)
- 9:00 AM: Day hike from campground OR explore the park
- 12:00 PM: Lunch back at camp
- 1:00 PM: Relax – read, nap, journal, or another activity
- 5:00 PM: Dinner prep and cooking
- 7:00 PM: Evening fire, reflect on the day
- 9:00 PM: Sleep
Sunday Morning
- 7:00 AM: Wake up, coffee
- 8:00 AM: Pack up camp (easier than you think!)
- 9:30 AM: Leave campground
- 10:00 AM: Stop for celebratory breakfast on the way home
What to Bring
Shelter & Sleep
- ✅ Tent (practice setting it up at home first!)
- ✅ Sleeping bag rated for the temperature
- ✅ Sleeping pad (DO NOT SKIP, the ground is cold)
- ✅ Pillow (or stuff a bag with clothes)
- ✅ Extra blanket
Clothing
- ✅ Layers (it gets colder at night than you think)
- ✅ Warm socks
- ✅ Hat and gloves (even in summer nights can be chilly)
- ✅ Rain jacket (always)
- ✅ Comfortable shoes for camp
- ✅ Hiking boots if you plan to explore
Food & Cooking
- ✅ Portable camp stove OR grill grate for fire
- ✅ Lighter/matches (bring backups!)
- ✅ Cooler with ice
- ✅ Simple meals (foil packets, hot dogs, canned soup)
- ✅ Snacks (trail mix, granola bars)
- ✅ Coffee/tea + way to heat water
- ✅ Reusable plate, bowl, utensils, cup
- ✅ Trash bags (leave no trace!)
Essential Gear
- ✅ Headlamp (and extra batteries)
- ✅ Phone charger + portable battery
- ✅ First aid kit
- ✅ Toilet paper (trust me)
- ✅ Water (more than you think you need)
- ✅ Sunscreen and bug spray
- ✅ Camp chair (game-changer for comfort)
Entertainment
- ✅ Book or journal
- ✅ Cards or small game
- ✅ Camera
- ✅ Downloaded podcasts or music (you might not have service)
Cost Breakdown
- Campsite reservation: $20-50/night (most state parks)
- Food: $15-25 (keep it simple)
- Firewood: $5-10 (if not included)
- TOTAL: $40-85 for the weekend
Note: If you need to buy gear, borrow from friends first or check Facebook Marketplace. Many people have camping gear collecting dust in their garage.
Where to Find Campgrounds
Best resources:
- ReserveCalifornia, ReserveAmerica, or your state’s park website (book 2-4 weeks in advance)
- Recreation.gov (for national parks and forests)
- Hipcamp (private campgrounds, often more available)
What to look for as a beginner:
- “Car camping” or “drive-in” sites (not backpacking)
- Sites with restrooms and running water
- Campgrounds with camp hosts (people who live there and can help)
- Sites near other campers (you won’t feel alone, but still have privacy)
Solo Safety Tips
✅ Tell someone your plans – Campground name, site number, when you’ll be back
✅ Check weather beforehand – Don’t camp in storms your first time
✅ Bring a portable phone charger – Even if you don’t have service
✅ Download offline maps of the area
✅ Bring a whistle – Three short blasts is the universal distress signal
✅ Trust camp hosts – They’re there to help you
✅ Don’t camp in completely isolated areas – Pick a campground with other people
✅ Store food properly – Use bear boxes if provided, or keep food in your locked car
What You’ll Actually Learn
Beyond the practical skills (tent setup, outdoor cooking, navigating a campground), here’s what this adventure really teaches you:
1. You’re more capable than you think
That moment Saturday morning when you wake up in your tent? You did that. You survived the night. You cooked your own food. You created your own shelter. That’s powerful.
2. Discomfort isn’t danger
Yes, sleeping on the ground is less comfortable than your bed. Yes, you will hear every twig snap. No, that doesn’t mean something’s wrong. Learning the difference between discomfort and actual danger is essential for bigger adventures.
3. Simplicity is freeing
No work emails. No scrolling. No endless decisions. Just: wake up, make coffee, be outside. It’s incredible how quickly your nervous system calms down.
4. You don’t need much to be happy
Hot coffee in the morning. A campfire at night. Stars you can actually see. Sometimes the best moments are the simplest ones.
Eliza’s Real Talk
Here’s my confession: I didn’t do a practice camping trip before Kilimanjaro. My first time sleeping in a tent was at 12,000 feet on the side of a mountain in Tanzania.
Was that the smartest plan? Probably not. Did it work out? Yes. But would I recommend it? Also no.
Here’s what I wish I’d done: one weekend camping trip at a state park before I committed to sleeping at altitude for a week. Not because I needed it to survive Kilimanjaro, but because it would have removed one variable from an already challenging experience.
When you’re on a big adventure, you want the basics (like sleeping in a tent) to feel comfortable. You don’t want to be figuring out camping AND altitude AND physical exhaustion all at once.
Learn from my “jump in the deep end” approach: start here first. Then when you’re on your big adventure, camping will feel like second nature.
You’ve got this.
Common Fears (And The Truth)
“What if I can’t sleep?”
You might not sleep great, that’s normal. Bring a book, enjoy the quiet. You will still have an adventure.
“What if I need to use the bathroom at night?”
Bring a headlamp. Most campgrounds have restrooms. It’s a short walk. You will be fine.
“What if it rains?”
Check the forecast. If it’s your first time, pick a clear weekend. If it drizzles a bit? Your tent will keep you dry. It’s cozy.
“What if I get bored?”
Bring a book, journal, cards, downloaded podcasts. But honestly? You won’t be bored. Being outside rewires your brain in the best way.
“What if I’m scared?”
That’s normal. Do it anyway. Choose a campground with other campers nearby. You are safe. And that fear? It’s part of what makes you brave.
Photo Inspiration
📸 Capture these moments:
- Your tent setup with sunset/sunrise in the background
- Coffee brewing on the camp stove
- The view from your campsite
- Your camp dinner cooking over the fire
- Starry sky (use night mode on your phone)
- Your packed-up car on Sunday (proof you did it!)
Make It Happen
This Week:
- Pick a campground within 1-2 hours of home
- Book a site for 1-2 weeks from now (Friday-Sunday or Saturday-Sunday)
- Borrow or buy essential gear
- Practice setting up your tent at home
- Plan three simple meals
- Tell someone where you’re going
- GO.
Start with one night if two feels like too much. Start with a campground that has full facilities if primitive camping feels scary. Start where you are. Just start.
Your first solo camping trip will give you confidence for every adventure after.
Ready to make this happen?
What’s stopping you from booking your first solo camping trip? Tell me in the comments. I’ll help you troubleshoot! 💛🏕️✨
Great list! I’ve done all of these (and have traveled solo many times abroad). The sunrise hike is one of my favorites, with delicate arch in Moab as one of the most memorable.
Sonia, I googled arch in Moab, and wow. I would definitely want to experience a sunrise hike there :).
I love this great choice of solo adventures. And the mix of different things you have done. Great to share your story and how to get the most out of each adventure. I am just not sure I would do the camping adventure. Past that in my life! But the rest all sound perfect.
Thanks Leigh. I’ve enjoyed each experience. I understand about camping :).
This is such a powerful reminder that adventure doesn’t have to be far away or expensive. I love how you break down solo travel into realistic, confidence-building steps, especially the sunrise hike and nearby town day trip. It really shows that the mindset comes first—and those small weekends at home are what make the bigger adventures possible later.
Thank you Agnes. These experiences have been so fulfilling. I agree, mindset truly comes first.